Friday, August 28, 2009
Manly Birthday Card
My brother is having a birthday next week. I knew I needed to get his card done, in order for him to get it on time. I was so glad it rained this morning because we were going to have a yard sale and it made it so I could get this card done, instead. The yard sale is supposed to be tomorrow, of which, I am ready for it now too.
I used some retired DSP on this card. Everything else I used is current Stampin' Up! products. I wanted to incorporate the balloons in with the cupcake. I thought masking would be a great way to get the effect I desired. I am very pleased with the end results. I used crystal effects on the balloons and sprinkles. I still need to purchase some of the beads because then I could use those for the sprinkles. In the mean time, the crystal effects worked just fine. I used the crazy for cupcakes stamp set and the teeny tiny wishes set for my images and saying. Since this was a manly card I used basic gray, night of navy, garden green, brocade blue, and whisper white cardstock. The retired DSP I used was called prestwick. For my tools I used the small star, 1/16" circle, ticket corner, modern label, word window, and spiral punches. Yes, I ended up using quite a few punches by the time I was done. For the ribbon I used 5/8" brocade blue grosgrain and 1/4" white grosgrain ribbon.
I hope you will take the time to leave a comment telling me what you think of it. I know these are not colors you would typically see for a cupcake, but I still love it anyhow.
I hope this has inspired you to.......................
Go-N-Stamp!!
Thursday, August 27, 2009
"I Like Your Style" Award
have blogs that we really enjoy visiting because they inspire us. If I could, I
would just return the award right back to the one that gave it to me because I love all of Mona's creations. Here are a few that I love to visit for inspiration, besides Mona's, Patty, Pam, Sandi, and Sherrill. I actually go to many others besides these ones, but to list all of them would take a while. Thanks to all of you that have inspired me. Everyone deserves an award. Every persons creations are uniquely their own. A talent that is given by God, who is the author of creation.
Thanks again, Mona! I really do appreciate this.
Now go-n-stamp!!
Thursday, August 20, 2009
Birthday Card Class #2
I am sure I could have done more to the manly card above, but I try to keep them simpler for the sake of time and my customers. They are pretty easy to please. :-)
Tuesday, August 18, 2009
I am a Grandma!!
Blake Scott was born, Sunday, August 16th, his actual due date. Weighing in at 8 pounds 1 ounce and 19 1/2 inches long. Yes, he is a cutey, of course!! Mom (Nicole) and Dad (Bryan) are very happy with this little addition to their family. Now they will realize how boring their life has been. Right? We often said, "What did we do before we had kids?"
I wanted to make a special card for Blake. It ended up that a regular card was not going to be big enough. I have been wanting to make a Tri-shutter card (tutorial is found here) because I have seen a lot of them being made lately. I decided this was as good a time as any to try one. It took me quite a bit of time to make it, but in the end I am very happy with the finished results.
Recipe for this card. (Stampin' Up! supplies)
Stamp sets: defining alphabet, cute and cuddly
Cardstock: certainly celery (textured) and regular, so saffron, bashful blue, naturals white, and delicate dots DSP (retired)
Ink: certainly celery, so saffron, bashful blue
Tools: 1 1/4" and 1 3/8" circle punches, large star and small star punches, wide oval punch, circle scallops #2 bigz die, big shot, (sneak peak) bear, small dots texturz plate, and stamping sponge
Accessories: soft subtle brads, jumbo eyelet pewter, and certainly celery ribbon (retired)
Please take the time to leave a comment and tell me what you think.
Now go-n-stamp!!
Tuesday, August 11, 2009
Fancy Favor Bag 2
I wanted to make another Christmas bag, but different. This bag was made with the snowflake #2 die, except I used the part you usually throw away for a template, instead of using the actual snowflake. What I found great to use to hold the template in place is the 2 way glue pen. Apply the glue sparingly on the template, let it dry, and then place it where you want it to be on your project. I used white craft ink on a sponge dauber to ink up the inside of the template. Remove the template and add white embossing powder and heat with the heat gun. Many of you have probably already tried this, but if not I hope this will give you another new way to create.
Here is the recipe for this project. All material is Stampin' Up!
Stamp Sets: Snow Swirled and Christmas Punch (Hostess set)
Ink: white craft
Stampin' write markers: handsome hunter and bravo burgundy
Cardstock: handsome hunter, bravo burgundy, and whisper white
Tools: Big shot, fancy favor die, snowflake #2 die, 1/2", 1 1/4", 1 3/8", and 1 3/4" circle punches, scallop oval punch, and wide oval punch
Accessories: white embossing powder
Now go-n-stamp!!
Tuesday, August 4, 2009
Farewell to DCBD
Even though I am no longer a design team member my goal is to still do some kind of challenge every week. It probably will not be from the DCBD challenges anymore though. There are a lot more blogs/websites that have challenges weekly. I will be getting my challenges from one of them.
So to all of my followers, I hope that you will continue to follow me, enjoy my posts, and get inspiration to go and create a project yourself.
The card that I have posted here was originally supposed to be for the DCBD challenge that will be up tomorrow on their blog. I had a lot of fun creating it and am totally pleased with how it turned out. I hope that you feel the same way. As usual I would love to hear what you have to say about it, so please leave me a comment.
Here is the list of supplies I used to create this card.
Stamp sets: Fresh Cuts and All Holidays
Cardstock: rich razzleberry, crushed curry, soft suede, and confetti white
Ink: rich razzlebery and soft suede stamp pads
Stampin' write marker: crushed curry
Tools: 5 petal flower punch, boho blossom punch, birds and blooms sizzlit set, Big Shot, stamping sponge, color spritzer tool, and white gel pen
Accessories: 1/2" polka dot rich razzleberry grosgrain ribbon, clear embossing powder, circle rhinestone brad (fire)
Monday, August 3, 2009
3 x 3 Card Class
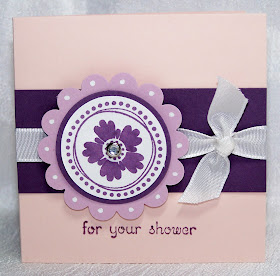
I love these cards for putting on a gift or even putting inside a gift bag. I think a lot of people think they need to have a bigger card, but I think these are great for baby showers and wedding showers. You may even have other ideas for these. If so, put your idea in the comments.
I really like how these cards turned out. There is only one that I still am not really liking. I may end up changing it up a bit. In case you are wondering, it is the very last card in this post. For some reason I just don't think, even though pastels do match, the bashful blue goes well with the other 2 colors. You can tell me your opinion on it too. In fact, tell me if you think I should change it.
I was only going to have 8 cards to begin with, but instead of making a little box to keep them in I went with the 2 extra cards. I also thought that the baby card I first made was mainly for a boy. When I made the last card I decided to make it into a baby girl card.
For these cards I used the soft subtles family. I used the cute and cuddly, teeny tiny wishes, and the priceless stamp sets. As you can see I also used quite a few different punches. All of the products are Stampin' Up!
Take care and thanks for taking the time to look.
Now go-n-stamp, Chris